Stretching After Weight Lifting – CrossFit New Jersey Workouts
Athletes enjoy the weightlifting side of CrossFit a lot. Weightlifting is a good way to test how you are progressing. You can see your progress in many ways from heavier weights to better technique. One thing that can prevent athletes from seeing progress is not stretching after you finish lifting.
Most of the time when you are finished weightlifting you are exhausted. You want to get protein in you and go home and rest from a hard workout. You don’t want to sit at the gym for another 10 minutes and stretch. However, when you don’t stretch this allows the lactic acid to build up and is the reason you are sore the next day and day after your weight lifting session.
Another reason stretching is important is it will help increase your range of motion and flexibility. This will translate to helping you in your lifts. If you constantly have trouble getting the bar overheard into the right position it is not just going to magically fix itself. You need to work on your mobility and that will help you get the bar to where you need it. Stretching can make it easier to get under the bar for snatch and cleans. Better hip flexibility will make it easier to get to the bottom of the squat and get more power from your legs on your pulls.
Always ask your coaches if you have any questions about stretching. They can give you a lot of specific stretches that will help you. If you are looking for a routine to do after you finish working out check out the video at the top. The video has examples of stretches that are designed for athletes and weightlifters.
The CrossFit Open Is Right Around The Corner – Cherry Hill NJ CrossFit
In a couple months weekly workouts will be coming out to start the process in finding the fittest person on earth. The Open has only been around for a few years but it has changed the sport of CrossFit forever. It has made the Regionals and the Games more competitive than ever. Even if you are not going to the Regionals or Games, the Open is a fun way to see how you compare to other athletes around the world.
Right now is a good time to start preparing for the Open. Use this time to get better at CrossFit movements you are not as efficient in. Athletes should be practicing now for movements they are not as good at. This is a much better strategy than waiting until the announcements and hoping CrossFit does not pick movements you do not know how to do. If we have learned anything from CrossFit over the years, Dave Castro will always pick movements that are difficult and challenging.
What is nice about the Open is last year CrossFit had two different divisions, scaled and RX. The scaled division allows for more athletes to participate in the Open. You get to see how you compare among athletes closer to your skill level.
I would suggest anyone that has been doing CrossFit to sign up for the Open next year. The workouts are challenging but a lot of fun to do with your fellow box goers.
If you want to learn more about the Open, watch the video at the bottom of the article. The video is a look at the Open and how it has grown over the past five years. CrossFit gives you content, interviews, and behind the scenes from the Open that no other sport is able to give you.
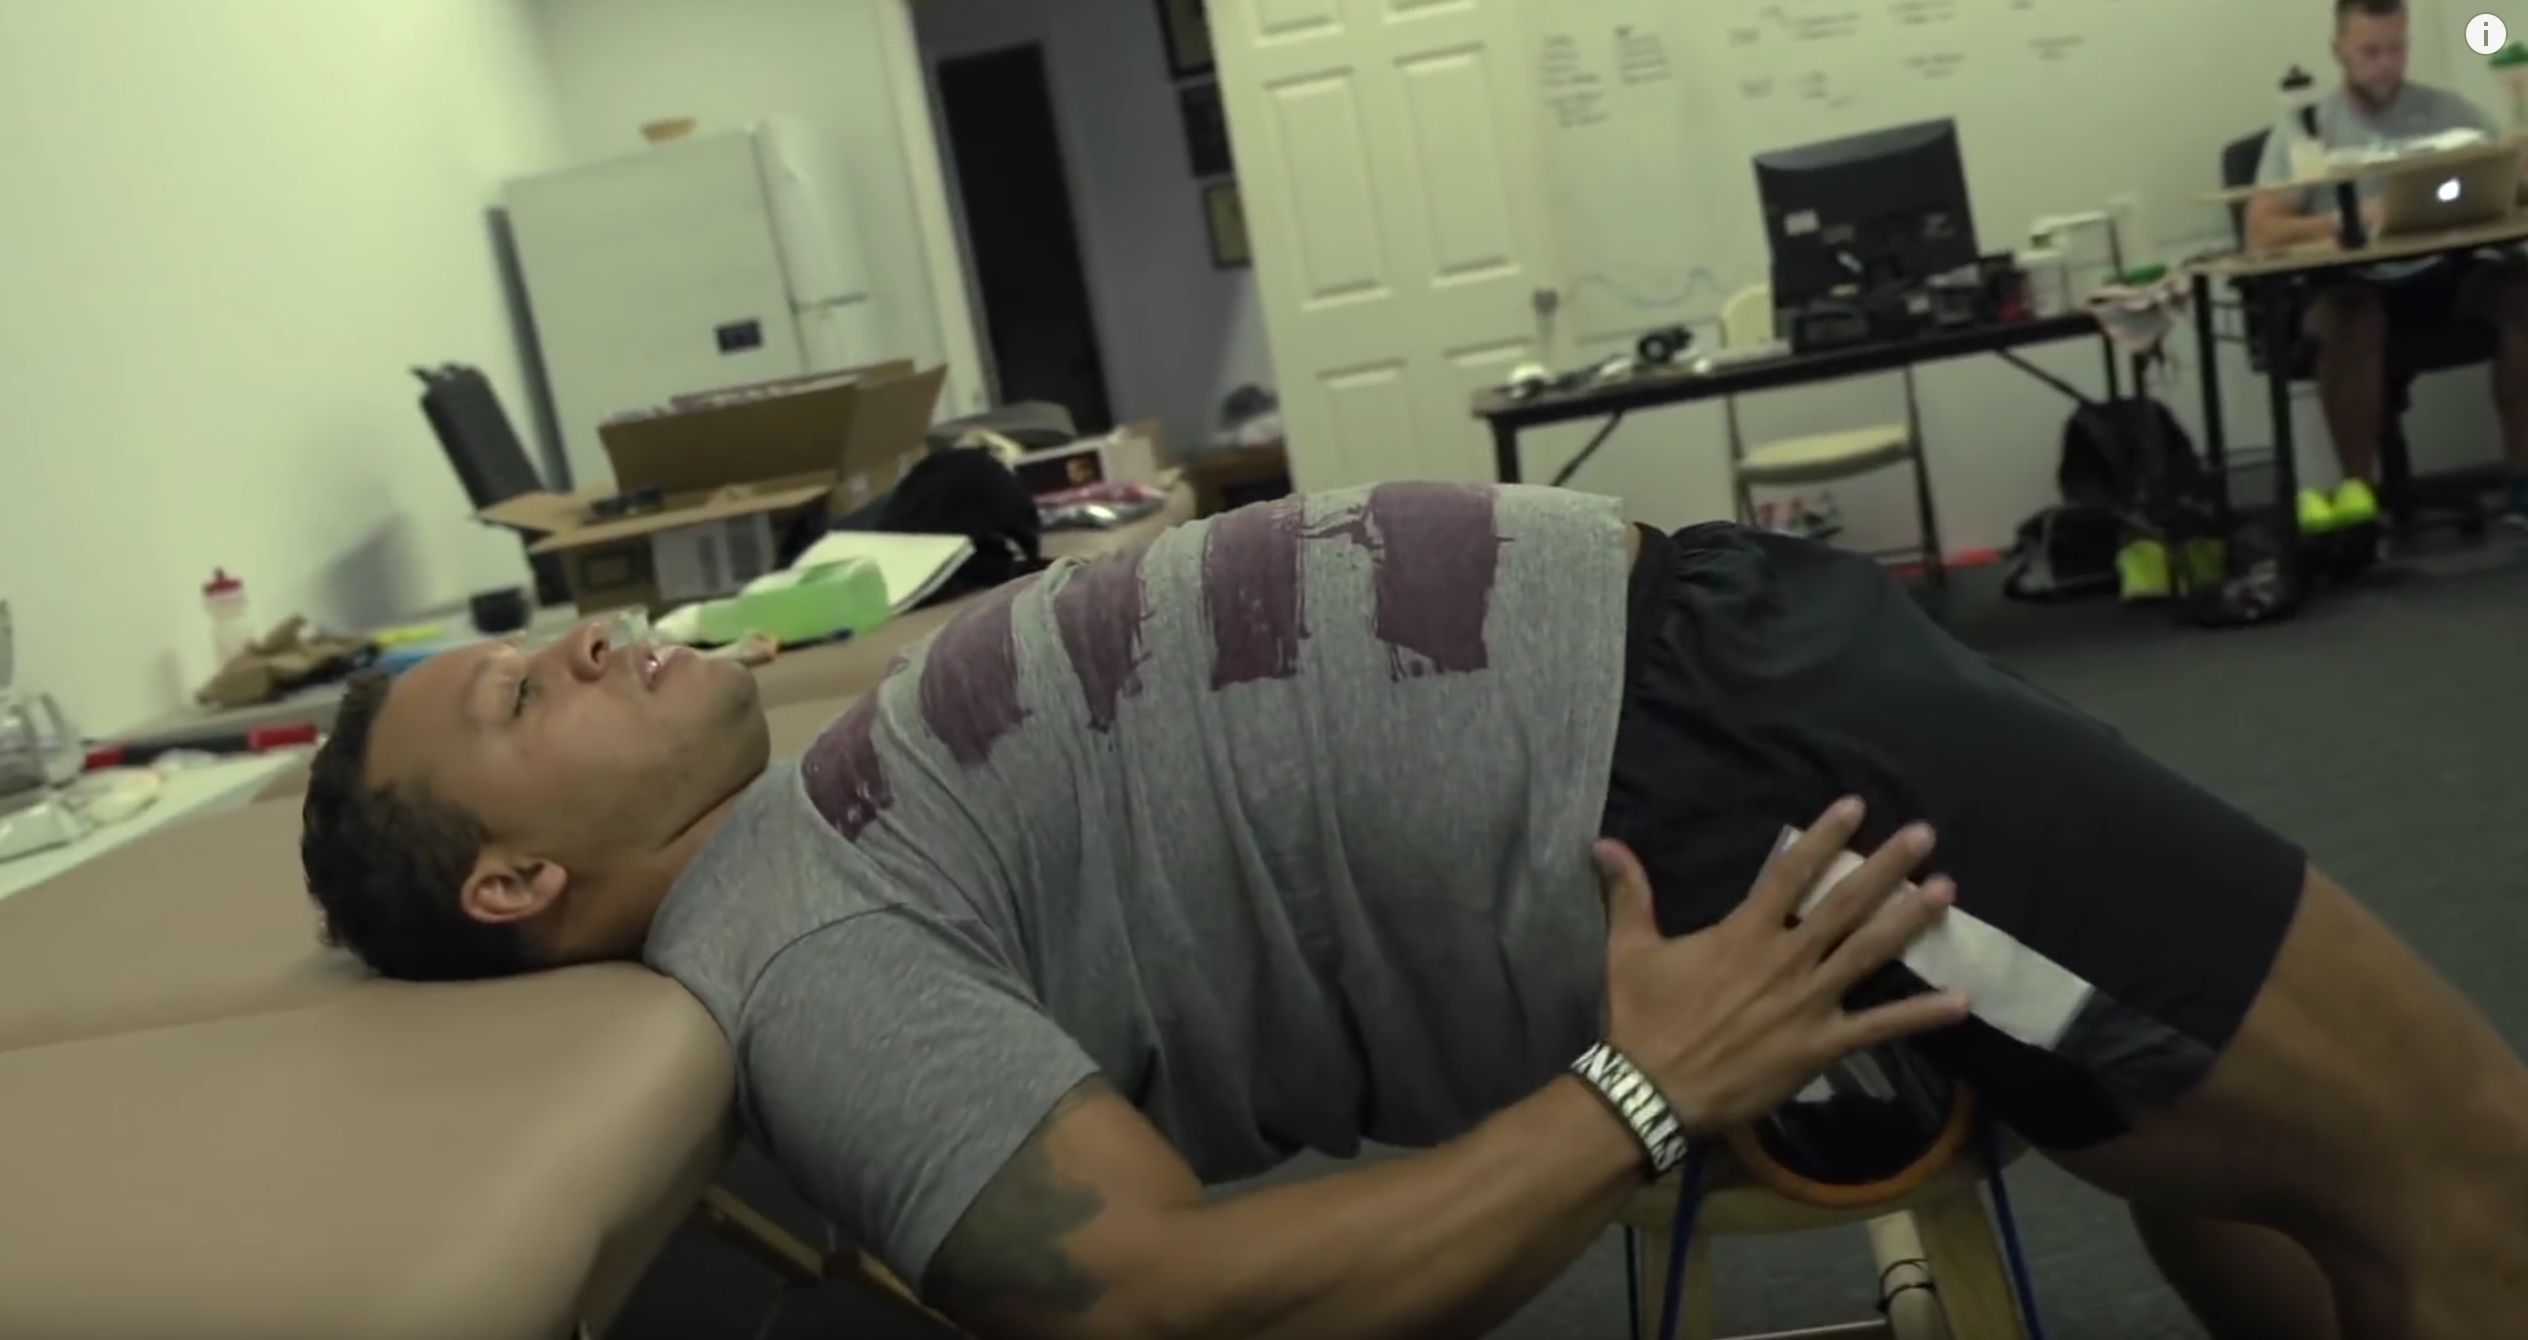
The Easiest 20 Minutes of Your Day…Guaranteed: ROMWOD – Cherry Hill CrossFit
We all know the importance of maintaining our bodies, especially with how demanding our sport is. Day in and day out we punish our bodies with rigorous exercise and activity. It’s only right that we spend just as much time aiding its (our body) recovery. Easier said than done…
Everyone’s busy. We barely have enough time to take an hour or two out of our day to workout, let alone another hour or two to stretch, mobilize, meditate, etc. Well, the folks over at ROMWOD (Range of Motion Workout of the Day) have made it easier than ever to take care of your body. It will be the easiest, and likely, most impactful, 20 minutes of your day.
Now let me state that I have absolutely no affiliate with ROMWOD, nor are they compensating me in any way for this blog. I’m just that impressed with it. I subscribed to ROMWOD a little over two weeks ago after seeing some of my favorite athletes posting pictures and videos on social media of their daily mobility. Since I am currently sidelined with an injury, I figured I would spend this time working on mobilization and range of motion. Offering a 7 day free trial, ROMWOD was an easy choice, so I subscribed.
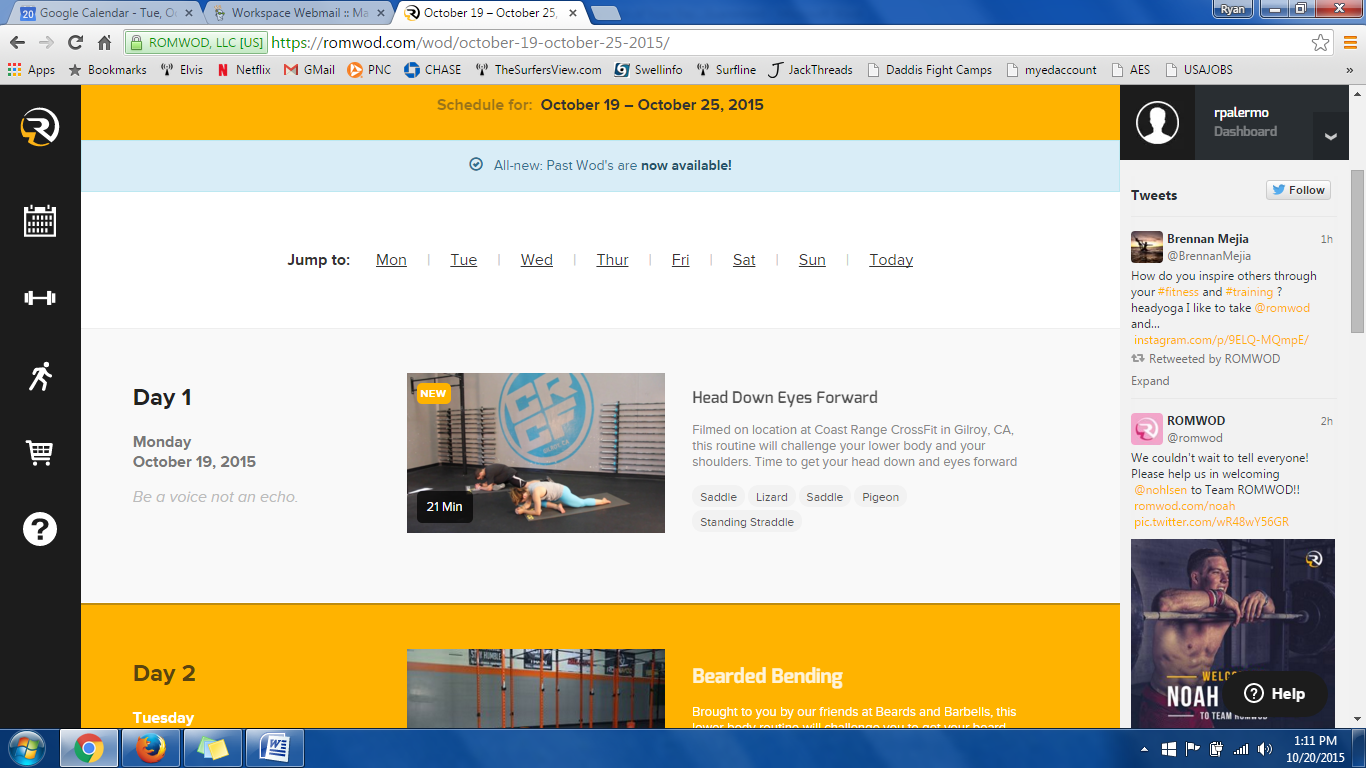
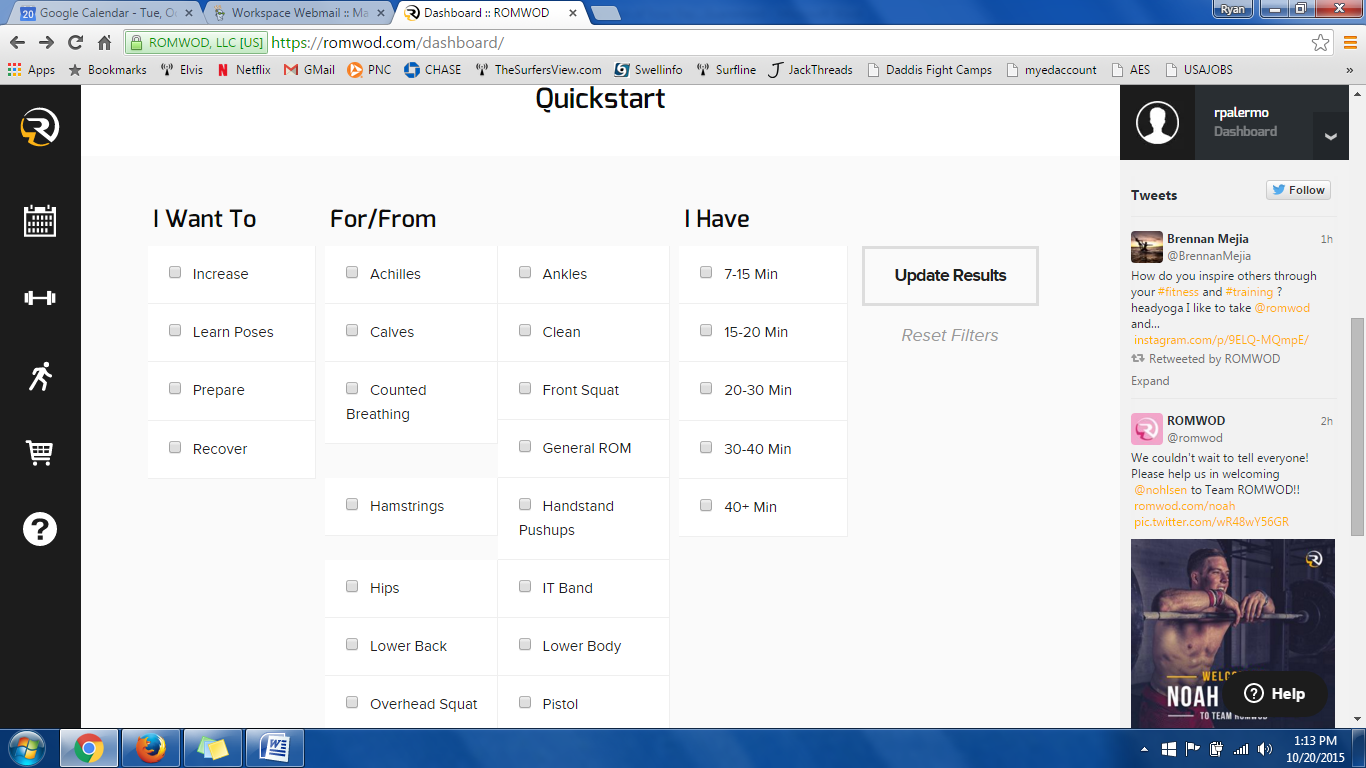
ROMWOD allows you to follow along with their daily range of motion programming, or can choose routines based off of your specific needs:
Weekly Programming
Customizable Routines
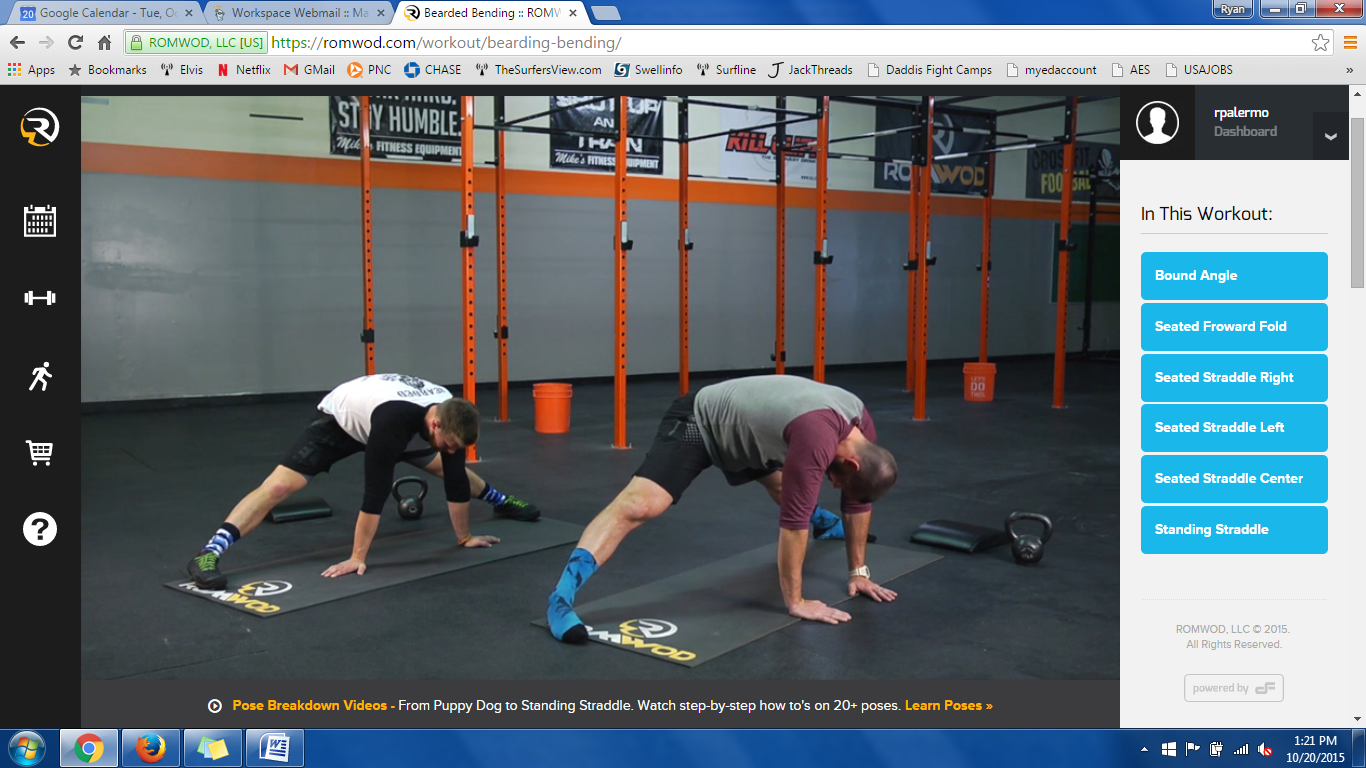
The routines are about 20 minutes long, perfect for a pre workout warm up or sneaking in before bed. Every once and a while the programming will call for a longer routine, maybe 40-45 minutes. Don’t have that kind of time? ROMWOD also gives the option for a “Short on Time” version. My biggest obstacle when working on mobilization on my own was that I never knew how long to hold a pose or if I was doing the pose properly. Am I breathing correctly? ROMWOD walks you through from start to finish, explaining each position and where you should be feeling the stretch, how long to hold, and even helps with breathing counts. It makes everything truly effortless on your part.
Two weeks after my first experience with ROMWOD…..I’m hooked! It has easily become my favorite part of the day and sometimes I’ll even do the routine twice (prior, it was a battle for me to even sit down after lifting for just 5 minutes to stretch!). The most impressive part is that I’m seeing results every day. I can get further into these poses than I was ever able to before and my range of motion has increased dramatically. If you are looking for a simple solution to maintaining your body, ROMWOD is the way to go….guaranteed!
4 Quick Steps to improve your OH Squat! CrossFit New Jersey
It’s been a couple weeks since we’ve tackled mobility last, so here are a few quick techniques to help with everyone’s favorite position (sense the sarcasm??)…….. the overhead squat.
The overhead squat is quite possibly the most demanding position we see in our daily training. It takes excellent ankle, hip, shoulder, and thoracic mobility to achieve this position comfortably. For most, it’s a battle to hold and maintain this position. So, it’s time to tackle this head on with a few quick techniques to help improve your mobility for this movement.
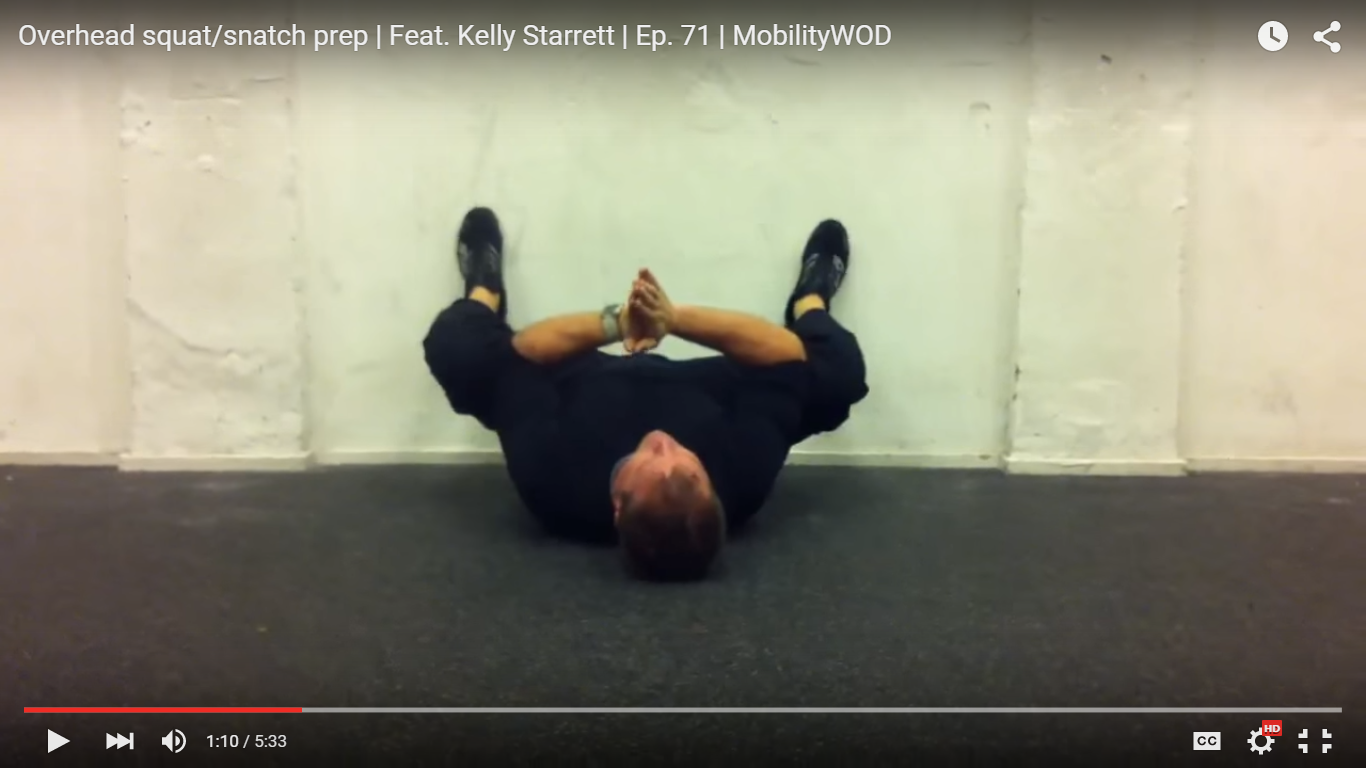
#1 ACTIVATING EXTERNAL ROTATORS
To get into a good, deep, overhead position, we must maintain a neutral spine and external rotation of the hip.
Start by sitting on the floor and lay back so your feet are up against a wall. You want your butt as close to the wall as possible. Load each hip by pulling your knees down and into your chest, making sure your feet are flat against the wall and pointing forward. Take your elbows and drive your knees out. You’ll want to use the contract-relax method, holding for about 10 seconds each time. Spend about 2-3 minutes here.
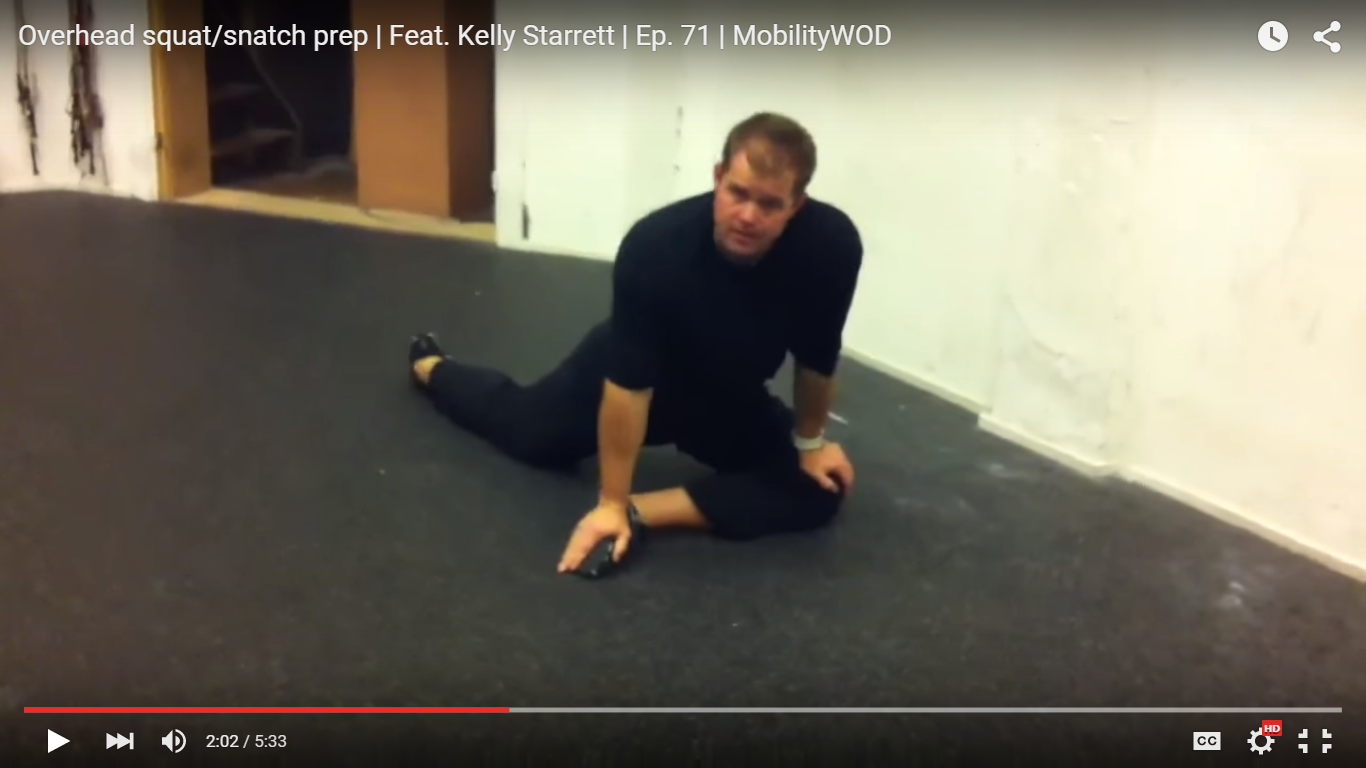
#2 PIGEON POSE
Traditional yoga positions can do wonders for your range of motion. Pigeon pose is a great example for what we are trying to achieve today, which is external rotation of the hip for our OH squat.
Start by getting into a lunge position, with one leg up and the other extended behind you (see picture). Lay your leg across your body on the floor and place on hand on the foot and the other on the knee. NOTE: If you feel any knee pain at all, STOP. You should feel this solely in the outer hip area and not in the knee. Stand and lay your leg across a box or something elevated to alleviate your knee issues.
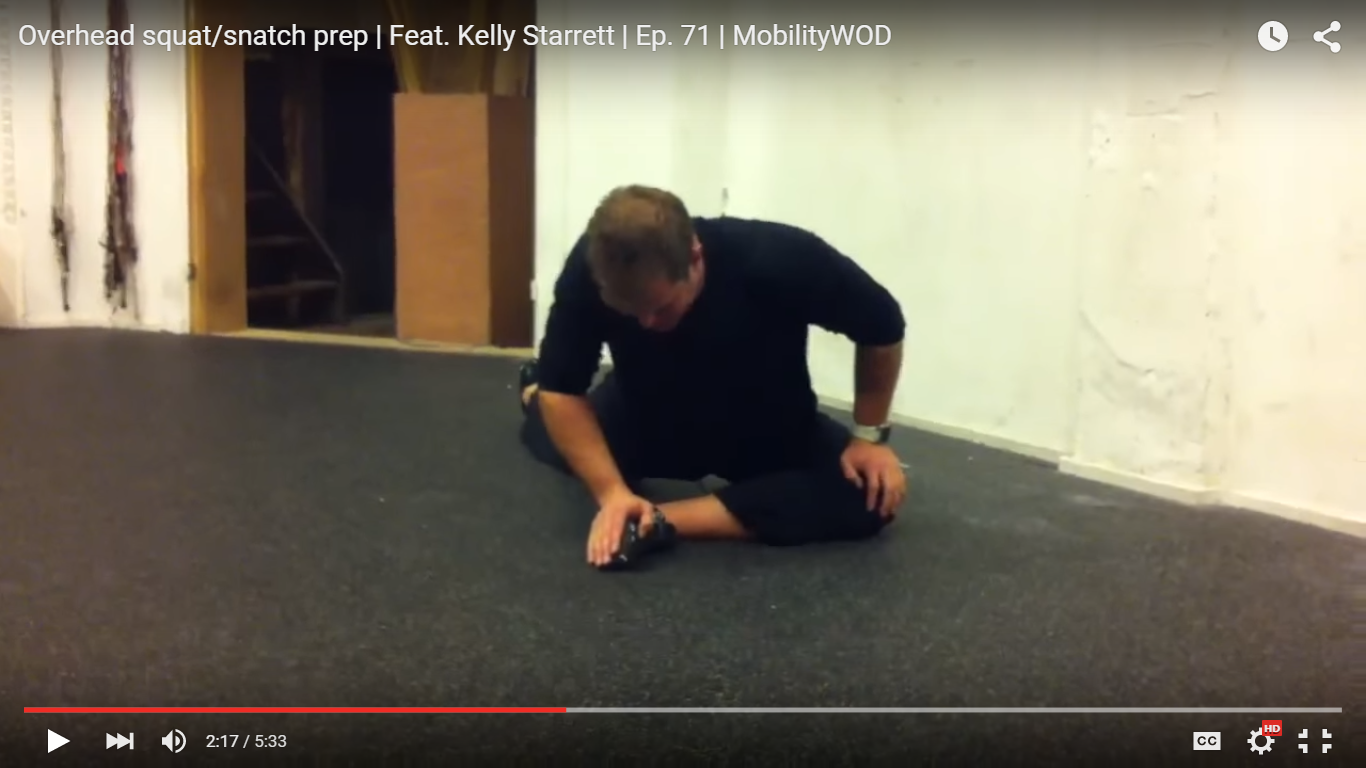
Accumulating another 2-3 minutes, spend time facing directly forward, but also moving around to find tight corners. You can lean more over the foot as seen in the picture above.
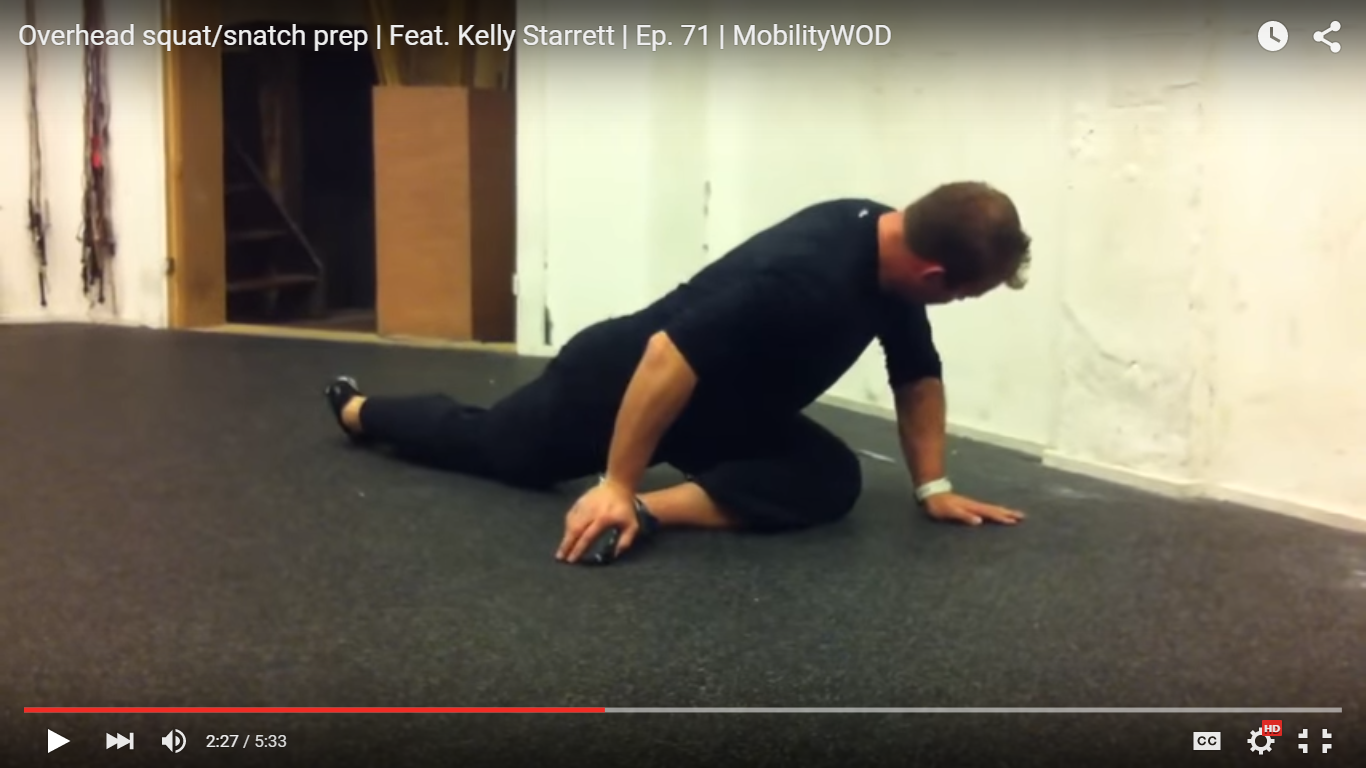
You can also lean more over the knee to find a different stretch. Find the area that feels best for you and spend some time contracting and relaxing.
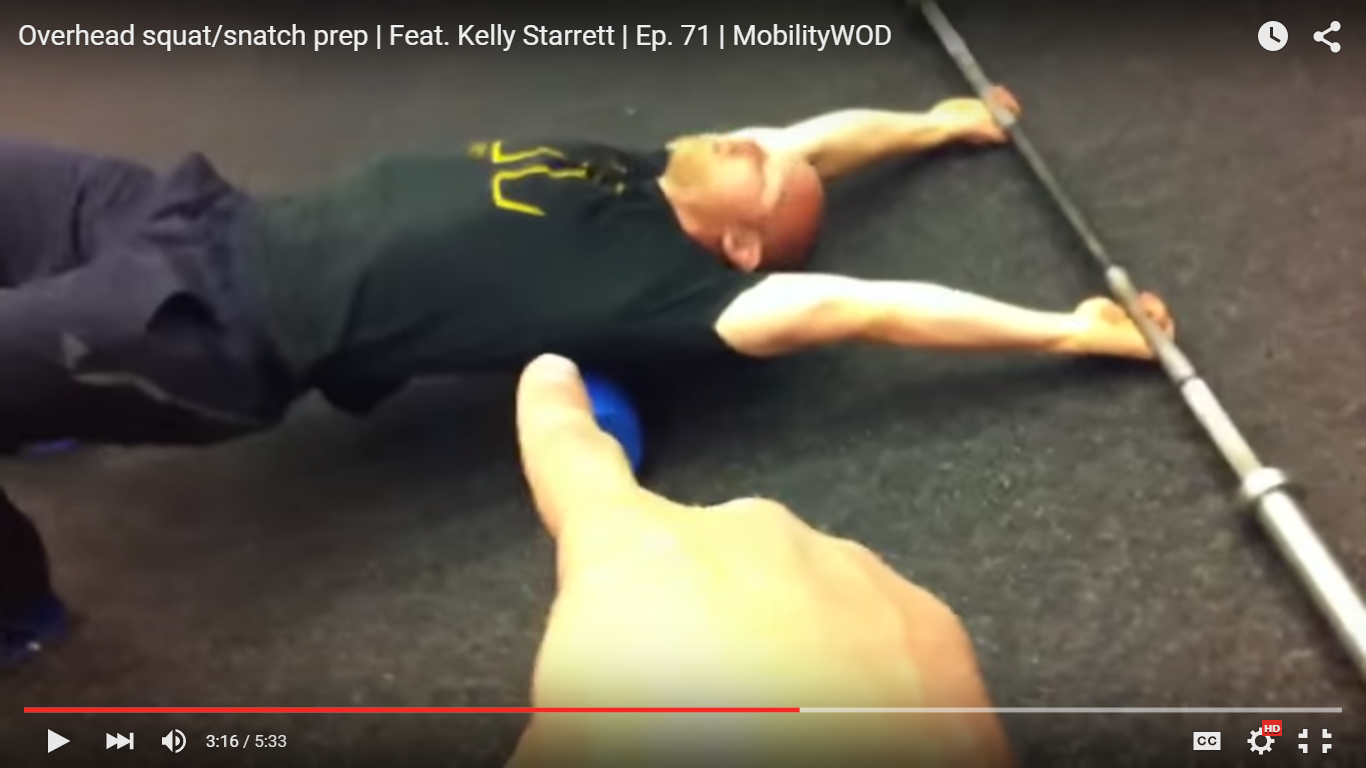
#3 THORACIC ROLL
Grab a foam roller and a barbell to start. Lie on the foam roller so that it’s under your mid to upper back and reach overhead to grab a barbell (acting as your rolling anchor) that is stationed on the floor. Start with your hips up….
And then load by dropping your butt, trying to pull the ribcage with it…
Deep breathing is the key to this exercise. Try to keep calm and maintain long inhales and exhales. Open the shoulders by allowing the barbell to distract your joints in the opposite direction.
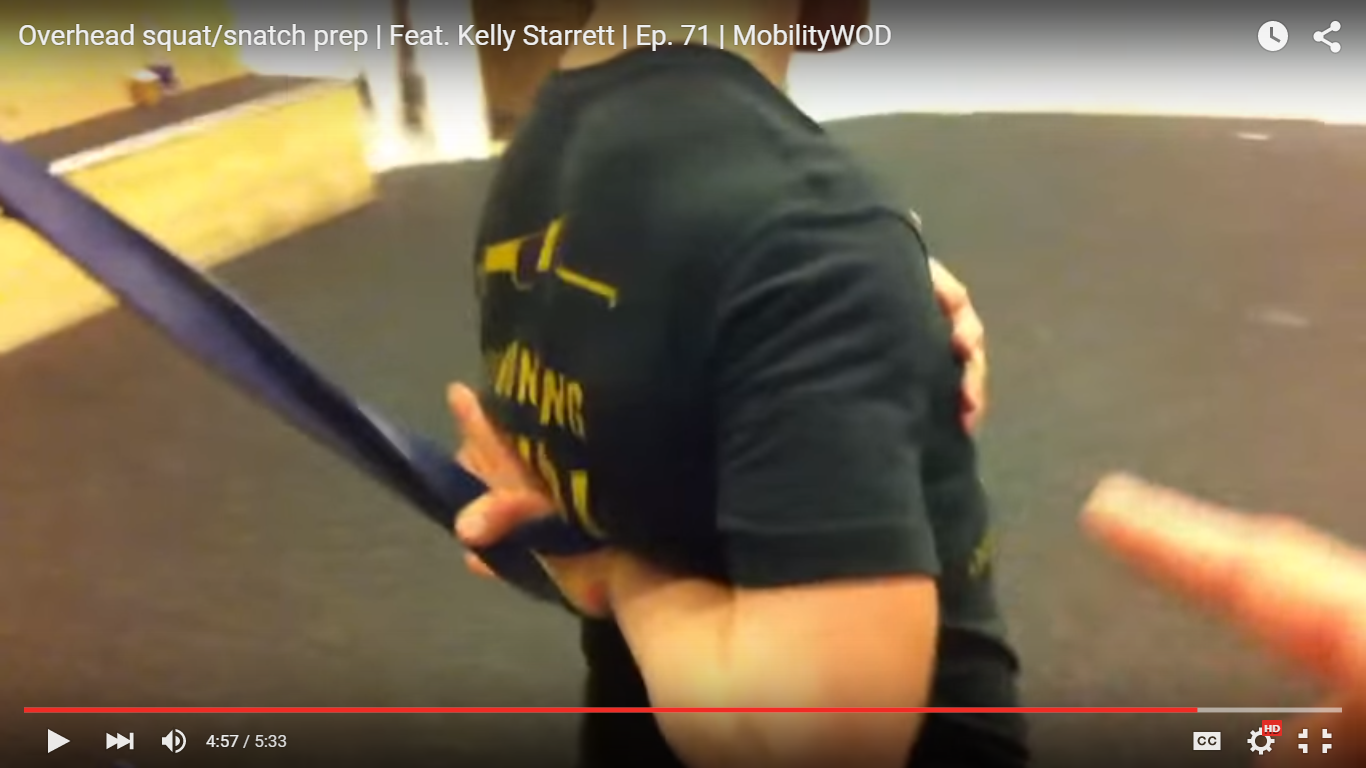
#4 BULLY STRETCH
You’ll need a band and something to anchor that band to that’s about shoulder height or higher. Put your wrist inside the band like so…..
Next, reach your hand behind your back and up the middle of your spine towards your head…..
The higher the band is anchored, the more intense the stretch, so be sure to start with the band low and gradually work your way up. The key to this technique is to keep the shoulder back in the socket and not allow it to fall or round forward. You can add a variation to this stretch by using your free hand to gently pull the neck towards the shoulder/arm that is not in the band.
These techniques are guaranteed to improve your overhead mobility, so give them a try before your next OH squat or snatch session!
Open your hips, quickly! CrossFit in Cherry Hill NJ
Short on time, but need to open up those hip capsules before your workout? Well, we’ve got the answer for you: The Batman hip opener. In many cases, tight hips and hips lacking end range of motion are contributors to lower back issues. By opening those tissues in the hips, you should see a lot less instability transferred to the lower spine.
THE BATMAN HIP OPENER
The only piece of equipment you’ll need is a sturdy resistance band, with something like a pull-up rig or support beam to anchor it to. This band will be supporting your body weight, so be sure to check the limits of the band ahead of time.
Start by hanging the band from your support structure. Get inside of the band, placing it under your armpits as pictured above.
We are looking to achieve the split and straddle positions to really begin to open our hips. These positions are normally tough (and sometimes torturous!) for most of us, so the band allows us to ease into these positions. Most importantly, it allows us to keep the chest up!
THE SPLIT
Depending on your personal range of motion, see how far you can get into the split and try to find your end range of motion without compromising your position and letting the chest fall.
THE STRADDLE
We can also use the straddle position to help increase our hip mobility:
Spend some time rotating forward and backwards:
You can also work side to side:
The support of the band should allow you to get into some corners that you normally wouldn’t have access too. Be sure to keep the legs as straight as possible. Have fun with this one and see how far you can get into each position!
Greg Glassman: King of CrossFit – New Jersey CrossFit
On Sunday, 60 Minutes re-aired a segment about Greg Glassman, the creator of CrossFit. The segment talked about Glassman’s philosophy on fitness, how CrossFit started out, and touched on the business side. Glassman believes through CrossFit he can help you reach your “genetic potential”. By genetic potential he means helping you create the body you would have developed in the caveman era to survive in the wild. CrossFit is all about the unknown and unforeseeable. The workouts help you transform your body so that you will be ready for anything that life throws at you from an earthquake to every day chores around the house.
Glassman created CrossFit after dropping out of college and becoming a personal trainer. His clients would perform CrossFit style workouts at traditional gyms. Gym owners were not a fan of his loud and untraditional style of training. He frequently got kicked out of gyms and had to find new places to workout. Finally in 2001, Glassman opened his own box in Santa Cruz.
Fast forward to today, there are now over 12,000 boxes. These boxes are all over the world from the United States to Australia. Glassman made it very simple to open up a box, $3,000 yearly fee and a two day seminar. Other than those two stipulations, there are no other rules. You can open up a box directly next door to another one if you wanted to.
I highly recommend checking out the whole 60 Minutes interview. It is a great way to learn more about the man who created CrossFit and to learn about how safe and effective these workouts are for your body.
Instant Hip Improvement for the Desk Athlete – CrossFit South Jersey Locations
Where all my desk warriors at?? This one’s for you!
Many of us have jobs that keep us mostly sedentary, slaving away as we sit in a chair (or in the car) for hours on end. This is MURDER for our hips and glutes! These desk athletes tend to have short hips, making it tough to achieve full extension without breaking at the midline, and as a result, hyper-extension occurs instead of a neutral spine. Here are a few tips for you all:
#1 – TURBOCHARGED HIP OPENER (PRE EXERCISE)
Using a resistance band, anchor the band to something sturdy and place one leg inside. Take a few steps back to create tension and, with the band right up under your glute, kneel down into the lunge position. You can use a plyo box or something nearby to hold onto. Be sure to drive your hips forward by squeezing your glutes and keep a neutral spine and chest position. Spend 2-3 minutes on each side.
#2 – ANKLE RANGE INSOMETRIC (POST EXERCISE)
Grab that plyo box from step #1 and place one foot up onto it with the top of your foot down against the top of the box. Begin to walk/hop forward so that you can keep a vertical shin as your sink down into a deep lunge. Again, be sure to keep a neutral spine. Try to hang out in this position for 1 minute, each side, two times.
So for all my “Executive” athletes with short hips, this one will be a game changer for you. Spend just a few minutes each day mobilizing with these techniques and you should see dramatic improvement in your hip position.
5 Deadlift Mistakes to Avoid – New Jersey CrossFit Classes
Deadlift is one of the fundamental movements of CrossFit. It is also referred to as the “King of All Lifts”. Improving your deadlift can help increase your clean and squat as well as helping you improve on your overall strength. Deadlift seems simple but there are common mistakes that people make. These mistakes can be holding you back from hitting a new PR. Here are the 5 most common mistakes in deadlift and how to avoid them:
#1 Too far away from the bar
When you deadlift you want to make sure the bar is as close to your body as you can. This is a little bit different than when you clean. You want to drag the bar up your shins and thighs so that the bar stays in contact with your body the whole time. When you set up make sure you start with the bar touching your shins and keep the weight back on your heels when you pull from the ground.
#2 Butt rising too fast
This mistake happens when the weight gets heavier. If you try to pull the bar off the ground and your butt rises up too fast, you will be pulling more with your hamstrings. This is not an efficient way to use your legs and back to pull the bar. A good way to avoid this is to make sure your hips and shoulders rise at the same speed until the bar is above your knee.
#3 Rounding your back
Rounding your back will happen a lot of times because of the previous mistake of your butt rising to early. You are not as strong when your back is rounded and it will put you in a bad position to deadlift from. This bad position could result in an injury if you continue to do it. The best way to avoid rounding your spine is by making sure you keep a nice neutral spine through the whole lift and by keeping your back nice and tight.
#4 Over extending at the top
This common mistake you will see when people over exaggerate getting your hips through at the top. This can lead to back pain or a hyper-extension injury of the lower back. This is very easy to avoid by just standing tall and pushing your hips through the bar.
#5 Jerking the weight off the ground
When you are setting up for deadlift you always want to make sure you are completely ready to pull the bar off the ground before you start. If your elbows are bent and you jerk the bar from the ground from that position it can lead to a major injury of the bicep. The best way to avoid this is by not rushing the set up. Make sure you are set up completely before you start to pull the bar. You can also flex your triceps which will make sure you cannot bend your elbows.
These five mistakes can be holding you back from your true potential in deadlift. Next time you deadlift when you are warming up check to make sure you are not making any of these mistakes. If you continue to practice with proper form you will see the weights go up in no time!
Welcome back! Today we tackle the ongoing issue of knee pain. Many of us have dealt with some form of knee pain throughout our fitness journey. Whether it’s some tightness or discomfort when squatting or pain due to impact while running, our knees take just as much abuse as any other part of our body.
We first need to look at our squat position. Any inclination of knees falling in or excessive push of the knees forward can cause tension throughout the anterior chain, resulting in knee pain. It may be as simple as reassessing the bottom of your squat and forcing your knees out. If you squat position is technically sound and the knee pain still exists, try these few mobility techniques and see if you knee situation improves!
#1 – CALF RELEASE
We do this stretch religiously against the rig at the end of each class, but try coming in a few minutes early and spend a few minutes here before your next squatting session. Try and get your heal as close to the wall as possible and drive your hips forward. MOST IMPORTANTLY, make sure your knee is staying out over the toes and not falling in! It’s very important to mobilize in the positions we desire to achieve!
#2 – FLEXION GAPPING
Grab a lacrosse ball and stick it behind your knee. Gently pull the knee into flexion, using the ball to smash any tight tissues and expand the front of the knee. Be sure to make a circular motion with your foot/ankle to hit this area really well.
#3 – FEED SLACK TO THE PATELLAR TENDON
Using the lacrosse ball again, this time placing it just above your knee cap, lie down on the floor and curl your leg up and down. The goal is to hit all three quadrants of the knee cap – laterl, medial, and internal. Your goal is for 20 repetitions at each point, creating space around the knee cap.
#4 – HIP CAPSULE OPENER
Grab a band and anchor it to the rig or something sturdy. Step in the band and bring it up to your hip, just under the glute. Step back to put tension on the band and drop down into the lunge position, kneeling on the leg that’s inside the band. Tie in the psoas by squeezing your glutes tight and stretching towards the opposite side, away from the banded leg. Reach overhead with your arms (see picture).
#5 – COUCH STRETCH
With one leg up against a wall, toe up and shin flat, bring your other leg up again into a lunge-like position. The key to this stretch is to keep the back leg as close to the wall as possible, and also to drive the hip down towards the floor. Be sure to find any tight corners that exist!
Spend a few minutes mobilizing each day and, over time, you should see some pretty awesome improvement with your knee issues!
Mobility Tips – A quick fix to hip impingement – CrossFit South Jersey
Hips still feeling tight after last week’s mobilization tips? Well, here’s another one comin’ at ya! Time to attack the source directly and clear that hip impingement!
#1 – HIP DISTRACTION
Anchor a band at ground level to something sturdy – the rig, a pole, or anything solid that you can wrap around. Step into the band with one leg and put it high into your hip. Begin by turning away from the anchor point and walking forward to create tension. Head down to your hands and knees, allowing the band to distract your hip back into the socket (towards the anchor point – see picture). Slowly oscillate your hip back and forth. Don’t fight the band. Instead, allow it to pull your further into deep flexion.
Add hip rotation by crossing your leg in front of your other leg, again allowing the band to do the work! Look for those tight corners by working your hip in different directions:
Be sure to spend a few minutes on BOTH sides!
#2 – LYING HIP DISTRACTION
Stay in the band after completing #1 from above, and turn over so that you are lying on your back, belly up. Keep your free leg flat on the floor and pull the leg in the band up towards your chest. Keep that leg extended, foot towards the ceiling and allow the band to pull your hip towards the anchor point.
You can also spend a few minutes pulling that leg across your body:
Be sure to test and retest by standing tall and lifting your knee as high as you can:
So next time your hips are feeling extra tight, be sure to give this gem a try. Let us know your results!